Buried deep within the Underdark of Baldur's Gate 3, the legendary Adamantine Forge stands as one of the game's most rewarding yet challenging discoveries. Since the game's full release, players have been diving into this molten marvel to craft some of the most powerful equipment available in Act One. As we move into 2025, this ancient dwarven creation remains a must-visit location for any serious adventurer.
Finding Your Way to the Forge
The journey to the Adamantine Forge begins with fragments of information scattered throughout the Underdark. To kick things off, you'll need to piece together clues from three drow explorers who each hold a key piece of information about the forge's operation.
Start at the Myconid Colony where you'll find Derryth Bonecloak, a merchant standing beside a blue bramble wall. Break through this wall to discover a chamber with a corpse holding a disguised book about the Adamantine Forge. This book, cleverly concealed as a text on "Lumph Mating Rituals," reveals the first piece of the puzzle.
"Talk about hitting the jackpot," as my gaming buddy would say. This hidden chamber is your first bread crumb on the trail to crafting greatness.
The second clue comes from Filro the Forgotten, camped on a cliff west of the Sussur Tree. Be prepared for a fight – this insane drow is accompanied by Hook Horrors that can knock your party members off ledges with a single blow. After defeating him, collect his notes for hints about the forge's guardian.

The third and final drow, Dhourn, awaits near the temple of Selune in the southeast Underdark. He's guarded by a spectator that will de-petrify charmed drow statues during combat. Once victorious, either speak with Dhourn or use the memory crystal from his body to reveal the forge's location.
Reaching the Adamantine Forge
After gathering information from all three drow, head to the duergar camp in southwest Underdark. If you've completed Thulla's boots quest, Gekh Coal will allow you to take his boat across the lake to Grymforge.
Navigation through Grymforge can be tricky. You'll need to:
-
Jump across gaps to reach dilapidated stone columns
-
Use levers to position suspended platforms
-
Activate teleport sigils to bring your entire party across
-
Defeat enemies guarding valuable Mithral ore
"This place is harder to navigate than downtown LA during rush hour!" But the rewards are worth every jump and puzzle.
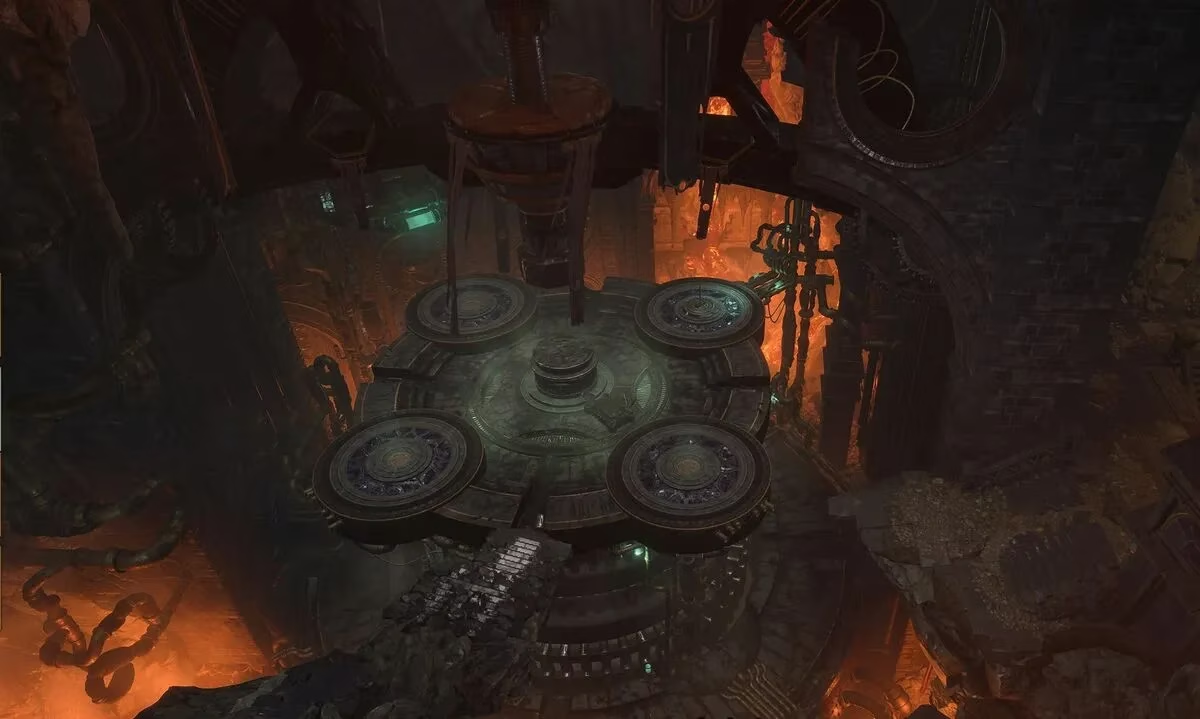
Operating the Adamantine Forge
When you finally reach the large circular platform of the Adamantine Forge, the real work begins. The forge operation requires several steps:
-
Insert a mold into the appropriate chamber (collect these throughout Grymforge)
-
Add Mithral ore to the central crucible
-
Use the forge lever to activate the massive hammer
-
Open the valve by the large grate to fill the forge with lava

This sequence will awaken Grym, the forge's fearsome guardian. This construct is no pushover – it has a massive health pool and numerous resistances. However, it has one key weakness: when superheated, it becomes vulnerable to bludgeoning damage.
Strategic Boss Fight: Defeating Grym
A smart strategy for defeating Grym involves:
-
Position one character on the central crucible before starting the fight
-
Have another character ready at the forge lever
-
Attack Grym and then jump to a platform opposite the grate
-
Have other party members skip turns or use non-damaging abilities
-
When Grym moves onto the central platform chasing your character, use the forge lever to crush it with the hammer
This tactic can deal over 100 damage in one blow! Remember that Grym must be superheated for this to work, as otherwise it's immune to bludgeoning damage.
Crafting Adamantine Equipment
After defeating Grym, you can finally use the forge to create powerful adamantine equipment. What you craft depends on the mold you choose:
Armor Options:
-
Adamantine Scale Mail: Prevents critical hits against the wearer and reduces incoming damage
-
Adamantine Splint Armor: Similar protection with slightly different stats
Shield Options:
- Adamantine Shield: Prevents critical hits and allows shield blow reactions
Weapon Options:
-
Adamantine Longsword: Always crits against objects and ignores slashing resistance
-
Adamantine Mace: Always crits against objects and ignores bludgeoning resistance
-
Adamantine Scimitar: Always crits against objects and ignores slashing resistance
"These items are the real deal, folks – top-shelf equipment that'll carry you through some serious scraps."
Important Tips for Forge Users
-
You can only craft two items initially, as Mithral ore is limited to two pieces in the area
-
Any mold can be used twice by ejecting it after the first use and placing it back
-
If you raise the platform prematurely, you'll need to lower it again to continue crafting
-
Don't forget to loot the Grymskull Helm from Grym's remains – it's a powerful item
The Adamantine Forge represents one of Baldur's Gate 3's most rewarding side activities. The powerful equipment you craft here will serve you well throughout Act One and beyond. Whether you're a veteran player on your fifth playthrough or a newcomer to the Forgotten Realms, this ancient dwarven marvel is worth the challenging journey.
For those struggling with the forge mechanics, remember that patience is key. Many players have reported issues with the forge getting stuck, but carefully following the sequence of operations should prevent any problems. If you do encounter issues, save before operating the forge and approach each step methodically.
Happy crafting, adventurers! The molten depths of the Underdark await.